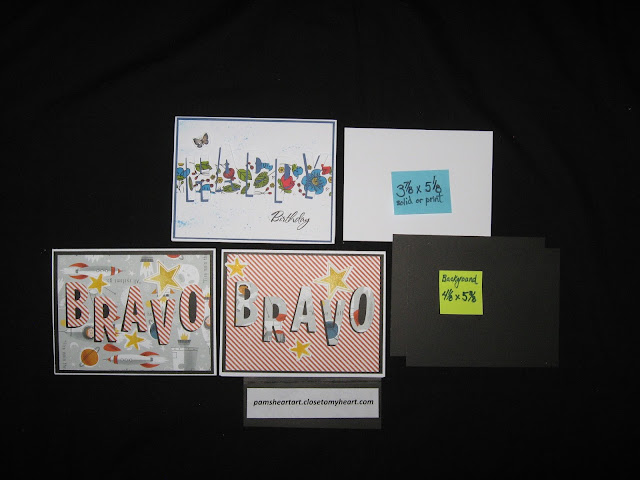
This month I have had such fun using our Block Alphabet Thin Cuts Z3386
to make cards. Letters are 1 1/2 ". Here I give the method and some tips for you to do the same.
Remember the Thin Cuts are on sale for 25% off during March!
Go to the shopping cart here and click on the "Shop Now" under the
Die-Namite on the cover page to see the full selection available!
 |
| Cut the pieces needed for your card. They will go on a standard card base which measures 4 1/4 x 5 1/2. |
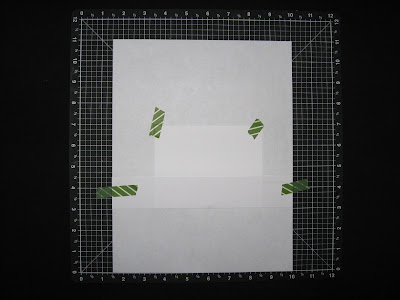
To stamp a border to color as in the Birthday card, cut a piece of thin
paper so it is 1 1/2 inches wide. Using washi tape, fasten it straight onto a
bigger piece of paper. Slip the cut piece under the mask piece and fasten at
the corners with washi tape.
Now stamp using a border stamp of your choosing.
Color in the stamped image. Then attach the Thin Cuts
to the base and keep in place using washi tape.
Because there are two "P"s in HAPPY, select another
letter the same width and use it as a place holder.
To finish your card, mount each letter slightly off center
of the negative space using foam tape.
For the Bravo cards, secure the Thin Cuts to the top
paper piece with washi tape. Then stack the two pieces
together and cut.
Just switch the letters on the print in the negative spaces
and you have two cards easily!
I used the Stargazer papers here and if you go back
to the top you will see I added stars Thin Cuts from the
Stargazer Card Making Stamps and Thin Cuts set Z4157
I would love to know if you made some eclipse cards of your own. Email me at
pamsheartart@boltfiber.net with your comments or questions.
With Heart,
Pam


No comments:
Post a Comment